
How to Install Wall Padding in Play Areas
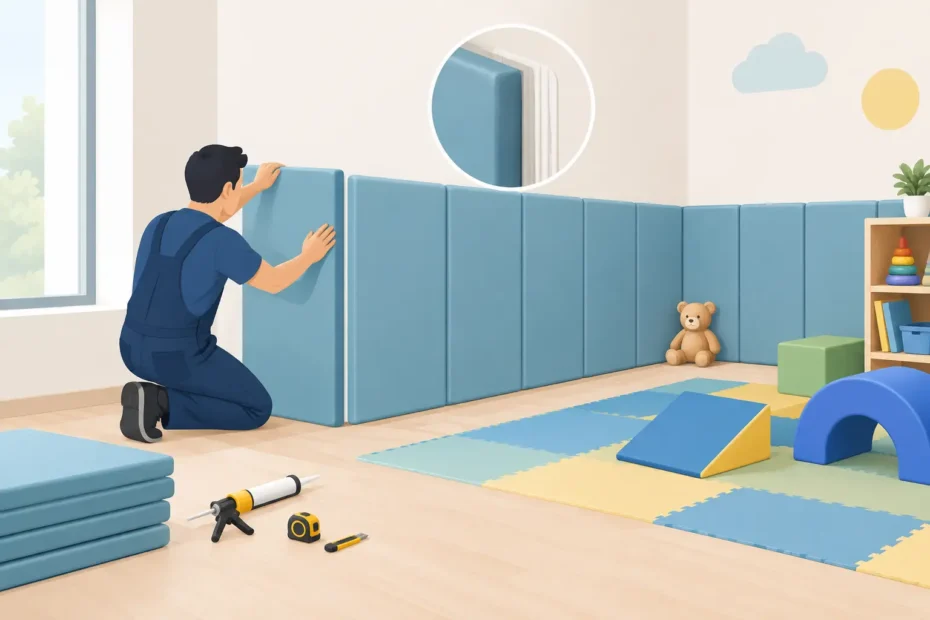
Children do not play in straight lines. They tumble sideways from soft play shapes, lean into corners, chase balls and test every edge in the room. Knowing how to install wall padding properly helps turn a hard impact zone into a safer, more confidence-building play space – whether you are fitting out a home playroom, nursery, school or busy soft play centre.
Wall padding is not simply a decorative finish. It needs to sit flat, remain secure, cover the right height and withstand regular cleaning. A good installation starts before the first panel reaches the wall.
Plan the padded area before ordering
Start by looking at how children will actually use the space. The walls behind climbing equipment, slides, ball pits, balance beams and active movement zones usually need the greatest protection. A quiet reading corner may need little or no wall padding, while a narrow room with hard side walls may need more extensive coverage.
Measure the full width and height of every wall section you intend to cover. Include awkward areas around doors, radiators, pillars, sockets, windows and skirting boards. Write each measurement down separately rather than relying on one overall room size. This prevents costly gaps and makes it much easier to plan bespoke panels.
The correct coverage height depends on the children using the area and the equipment nearby. For babies and toddlers, lower-level protection may be enough around a soft play zone. For older, more active children or commercial equipment, padding often needs to continue higher up the wall, particularly beside climbing and sliding features. If children can fall, jump or be pushed into it during normal play, it is worth protecting.
Do not overlook corners. A padded flat wall is useful, but an exposed corner can still create a hard contact point. Purpose-made corner protection or carefully designed overlapping panels give a neater, safer result than trying to force flat pads around an angle.
Choose the right fixing method
The wall construction determines how to install wall padding securely. A solid brick or block wall, timber stud partition and plasterboard wall all need different fixings. Never assume that a panel can be fixed safely with standard screws or adhesive alone.
For permanent nursery, school and commercial installations, mechanical fixing is usually the stronger long-term choice. Panels are commonly secured using appropriate screws and fixings through designated fixing points, then finished with covers where required. The fitting must reach solid material behind the surface, not just the decorative face of plasterboard.
On a timber stud wall, locate the studs first and mark their centre lines. Fixing into the timber gives the panel proper support. If the wall has metal studs or an unknown internal structure, seek advice before drilling. A heavy-duty fixing that looks secure at first can pull away over time if it has not been selected for the wall type and panel weight.
Adhesive can be useful for lightweight domestic padding or as an additional bond where the manufacturer permits it. It is not automatically the best solution for every setting. Adhesive can damage painted finishes when removed, may fail on dusty or uneven surfaces and makes future replacement more difficult. In a high-use play environment, a mechanically fixed system is generally easier to inspect and maintain.
If you are hiring a venue, fitting out a leased property or want the option to move the equipment later, discuss a removable fixing plan before you order. The cheapest method on installation day is not always the best value once repairs, relocation or replacement are considered.
Prepare the wall properly
A clean, sound wall makes fitting faster and keeps the finished installation looking professional. Remove pictures, hooks, loose trim and anything that will prevent the padding sitting flush. Repair damaged plaster, fill holes where needed and allow fresh paint or filler to dry fully.
Check for pipes, cables and other hidden services before drilling. Use a suitable detector, work carefully around sockets and switches, and do not cover electrical access points that need to remain available. Where a radiator, fire exit or ventilation point is involved, plan around it rather than treating it as an obstacle to hide.
Next, clean the surface. Dust, grease and loose paint reduce adhesive performance and can stop a panel sitting level against the wall. A quick check with a spirit level is worthwhile too. Floors and ceilings in older buildings are not always perfectly straight, so establish a level reference line rather than following a crooked skirting board.
Lay the panels out on the floor in the order they will be installed. This is especially useful for custom colour layouts, alternating designs or a large wall made from several sections. It lets you check the arrangement before any holes are drilled and avoids fitting a panel in the wrong place halfway through the job.
How to install wall padding step by step
Begin at the most visible corner or at the centre of the feature wall, depending on the panel design. If the panels have a clear left-to-right pattern, start from the specified edge. If all panels are identical, starting from a true, level line makes it easier to keep joints neat across the room.
Hold the first panel in position and mark the fixing locations through its pre-made holes or mounting points. Put the panel down before drilling. Drill to the required depth, fit suitable plugs or anchors where necessary, then lift the panel back into place. A second adult is useful for larger pads, both for accuracy and safe handling.
Insert the fixings without fully tightening them at first. Check that the panel is level and sitting flat, then tighten evenly. Do not over-tighten screws, as this can compress the padding, distort the cover or create an uneven finish. The aim is a secure panel with no movement, not a fixing driven as far as possible.
Fit the next panel closely alongside the first, following the recommended gap or overlap for that design. Avoid leaving finger-sized gaps that can trap dirt or expose hard wall edges. Check alignment every few panels, not only at the end. A small error at the start becomes much more noticeable across a long nursery wall.
For cut-outs around sockets, doors or unusual features, do not improvise with exposed foam edges. Order custom-sized panels where possible, or use properly finished sections designed for the purpose. A professional-looking installation is easier to clean and gives children fewer edges to pick at.
Once every panel is fitted, run your hand across the joins and around the perimeter. There should be no sharp screw heads, loose edges, proud fixings or sections that lift away under gentle pressure. Fit any supplied caps, trims or cover strips only after the panels have been fully aligned.
Match the padding to the level of use
Home playrooms often need a practical amount of protection around one active zone. You may only need wall padding behind a step-and-slide unit, ball pit or climbing shapes. This can keep costs sensible while still protecting the areas where bumps are most likely.
Nurseries, schools and commercial soft play sites need to think more widely. Children use the space every day, furniture moves, groups become busy and cleaning is more frequent. Durable wipe-clean covers, strong internal foam and secure fixings matter just as much as the initial appearance. Higher-use settings should also build regular inspections into their opening and closing routines.
Colour choices matter too. Bright panels can define a play area and make the room feel more inviting, while calmer colours can work well in sensory spaces or compact home rooms. Bespoke sizing and colour combinations allow the padding to fit the room rather than forcing the room to fit standard pieces. Softplay Toys4Kids manufactures in the UK and can help customers create practical padding layouts for domestic and commercial spaces.
Check the installation before children use it
Before opening the play area, inspect every panel closely. Pull gently at each section, check that all screw covers are in place and make sure there are no gaps at the floor line, corners or joins. Look from the side as well as the front, as raised edges are easier to spot at an angle.
Wall padding reduces the severity of contact with hard surfaces, but it does not make unsafe play safe. It is not a replacement for age-appropriate equipment, suitable flooring, adult supervision or sensible room capacity. Keep climbing equipment positioned as intended, prevent children from throwing hard toys in active zones and remove damaged equipment promptly.
Create a simple routine for ongoing checks. In a busy setting, inspect padded walls daily for tears, loose fixings, staining and pulled seams. At home, check them whenever you clean the room or rearrange equipment. Wipe-clean covers should be cleaned using a mild method suitable for the material, then dried properly so moisture is not trapped around edges.
If a panel becomes damaged or starts to move, take action early. A small loose corner is easier and cheaper to repair than a fully detached pad. Replace worn fixings and damaged sections with compatible parts rather than relying on tape or temporary repairs.
A well-fitted padded wall gives children more freedom to move, climb and play with confidence, while giving parents and providers a far more reassuring space to manage. Measure carefully, fix into the right structure and inspect regularly – those three habits make the difference between padding that merely looks good and protection that keeps working when play gets lively.
Leave a Reply